I tried eco printing some time ago, having seen some interesting posts on Instagram. Eco printing consists in creating marks on paper or cloth, using vegetable material. As you can imagine, depending on the type of paper or cloth, the results vary widely. Cotton will dye differently from silk, and watercolor paper differently from rice paper. Various plants and flowers also leave more or less color, in more or less distinct patterns. Apparently red cabbage makes bright blue marks, something I have yet to try.
It is necessary to use a mordant such as alum powder or rusty metal to help the color adhere to the material better. After that, the plants are placed upon the paper, tied in bundles, and either left in the sun for a day or more, boiled, or steamed. Some people place paper sheets flat between boards, others roll them up in a bundle tied with string. The whole thing is a lot of fun since you can never be sure of the result—only perhaps if you have done this for years? But even then, I saw on Instagram that people are always getting surprises. The idea is to experiment as far as your fancy takes you.

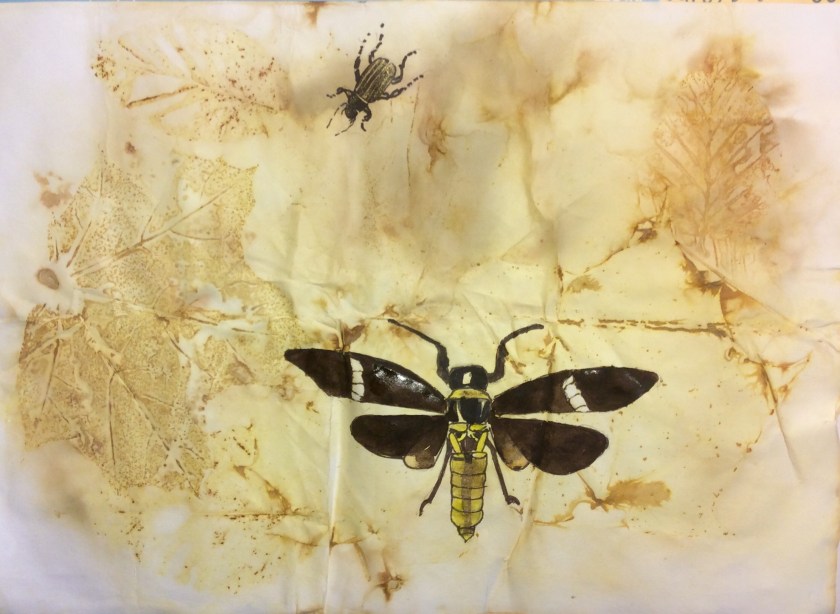
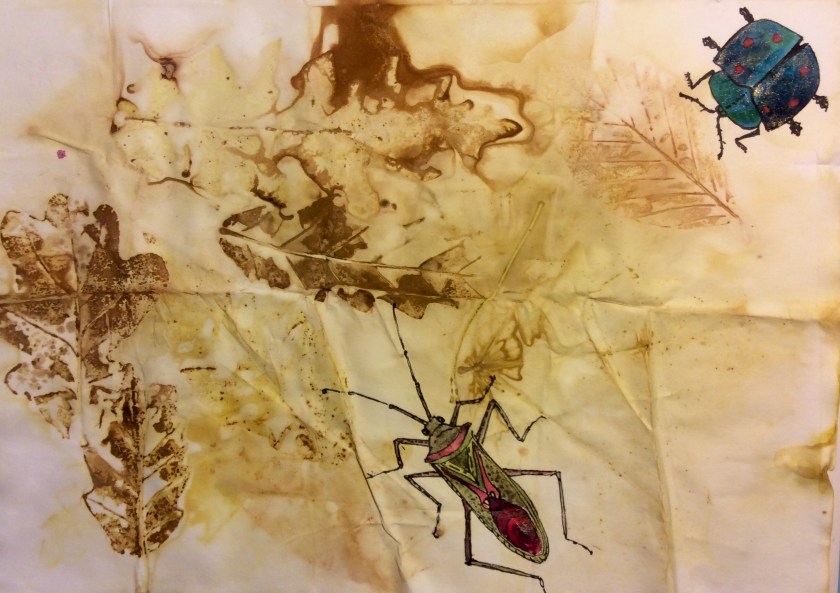
The first time I tried it, I soaked the paper in water with alum and used dead leaves, mostly maple and oak, since it was the autumn. The results were quite satisfying, and I painted moths and insects on top, and even a lizard.

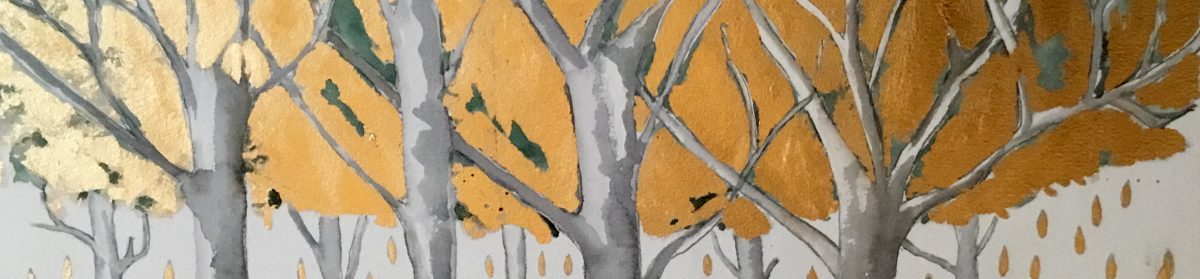
This time I wanted to created material I could use for collage, in a series of paintings I’m planning about Greek nature. As some of you might know, I’m very into layers and textures at the moment, so I thought this would provide an extra dimension. I wanted to try rice paper, because of the transparency, so I used some of that, plus normal watercolor paper I had left over from last time and kadhi paper, which is made from cotton rag. At the last minute, I threw in some tissue paper too.

For the plant material I gathered a collection of fresh green leaves and flowers: bougainvillea, oleander, lavender, along with fig, olive and plane tree leaves. And some sprigs of rosemary.
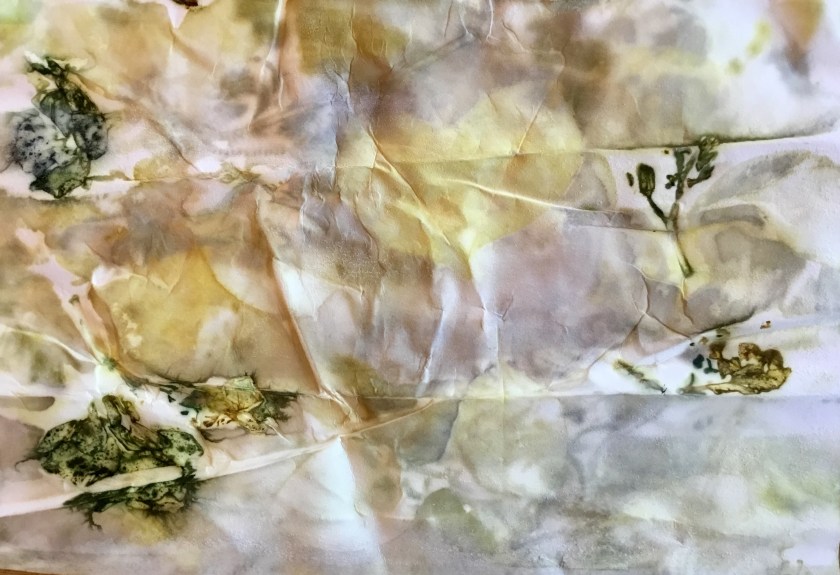
As I wanted to get quite a subtle effect, I used vinegar and rusty metal as a mordant instead of alum. The results were full of surprises, as always.

Strangely, the bougainvillea flowers left almost no marks on the paper, despite their bright coloring. Generally colors were a lot less bright than on the paper which had been soaked in the alum solution, and marks a lot more distinct on watercolor paper than on the rice paper.

The rice paper sheets stuck to each other and tended to tear when I tried to separate them. Of course, I did so while they were still damp, so maybe I should have been more patient and let them dry first. The tissue paper came out like a wad of used Kleenex, and I only managed to salvage a few scraps.

As seen above, the results look rather a sorry lot. However, they will still do my job, since I will be tearing pieces off, glueing them to my paper and painting or drawing on top. So I have ended up with a large pile of very interesting material to experiment with, and can’t wait to get started!

I have not here included instructions for making eco prints, as these vary wildly and there are many to be found easily by googling. However, I will recommend two Instagram sites: Fallowflora and book.and.paper.arts have some great examples and are worth taking a look at.
If anyone has done or does this and has some tips or remarks for me, I would be very pleased to have them!


Such an interesting art/craft experiment, and I love what you have done so far, Marina.
Best wishes, Pete.
LikeLiked by 1 person
No surprise to hear that I am fascinated with what you are doing! Love the beetles and lizard ~ it is like they are crawling over their own environment. You must be intrigued with the unpredictability of the the colours. Which leaf made that wonderful yellow colour? Looking forward to seeing what you create with them.
LikeLiked by 2 people
Love the images of the “vermin” crawling over your “eco”. In the “olden days” painters actually used certain insects for pigment in paint. Beetles, if I remember correctly, were highly pigmented (and crushable).
LikeLiked by 1 person
Yes, you’re right! Can’t remember what color crushed beetles made, tho. Must look it up
LikeLike
Carmine, made from the cochineal beetle
LikeLiked by 1 person
You are very, very talented….
LikeLike
This is just messing about, Franklin!🤣
LikeLike
What fun you’re having – can I come to your house to play? Seriously, the surprise papers are really gorgeous and I love the paintings you’re doing on top.
I used to teach paper making to kids, and we sometimes included things like onion skins, tea bags, coffee grounds, and leaves of all sorts to make colors and impressions. Mulberry leaves were effective, as I remember. The kids didn’t like painting on their hand made paper – I think they found it too unpredictable – but they did like making collages with them.
LikeLike
Thank you Sharon! My grandchildren helped me gather the leaves and flowers—next time we can do the whole thing together. Great idea!
LikeLike
fascinating – must try this…
LikeLiked by 1 person
Yes, you must!
LikeLiked by 1 person
I think I need to pin up a ‘to do’ list on the wall
LikeLiked by 1 person
😊
LikeLiked by 1 person
What lovely results you got from your experiments. It looks like loads of fun too and I expect your grandchildren would love to try it with you next time.
LikeLiked by 1 person
Thank you, it is fun. And messy!
LikeLike
Interesting to see that the sheet that had lavender flowers and leaves on it produced colour and quite crisp outlines of the leaves. I wonder if it’s the high oil content in lavender that did that, and if you would get the same result if you used lemon peel, for example…
LikeLike
Ooh, good idea, must try it. And the red cabbage. I was a little disappointed with the bougainvillea flowers, though. I thought I’d get some pink, at least…
LikeLike
I think maybe the bougainvillea flowers are a bit dry and papery, not very sappy, so colour transfer is difficult. Maybe try geranium or cyclamen flowers which are juicy, and eucalyptus leaves (if you can access them) which are oily. That way, you’d find out if it’s the juicy or oily ones which work best.
LikeLike
The colours that come out are very subtle and I can see that they’ll be interesting in a collage. I like the pictures with the insects crawling among the leaves.
LikeLike
Thank you, April. They’re fun to do. Unwrapping the bundles is quite a thrill!
LikeLiked by 1 person
I’m sure it is.
LikeLike
Fascinating. You are so creative and adventurous.
LikeLiked by 1 person
Thanks!
LikeLiked by 1 person
These are great. I especially love the lizard one. How creative.
LikeLike
Thank you, Misty! 🌹
LikeLike
Nice Work,
.
.
Salute for your creativity level.
LikeLike
Very inspiring. One more for the to do list!!🌼
LikeLike
What a lovely thing to do! I love the way that the results are very random. Your insects and lizards are fabulous.
LikeLike
Thank you Georgie! Yes, it’s fun—lots more things to try out.
LikeLike
What an exciting experiment! I love all the photos showing the process and the results. once, I tried to dye sheep’s wool that I ‘harvested’ from one of our sheep, but I didn’t know about alum so it didn’t work well… maybe I’ll go back to the sink again… don’t have the sheep anymore, tho, sadly! re the red cabbage, interestingly, it makes a beautiful cyan color!
LikeLiked by 1 person
I’ll try it next time. The problem with all this kind of thing, it makes a mess, and takes ages to clear up. Also I don’t have a studio, I work in my kitchen, so it mostly has to be cleared up in time for dinner!😬
LikeLiked by 1 person
lol I have the same problem hanging my laundry from a bar in the shower – it needs to hurry up and dry and I need to hurry up and put it all way!
LikeLiked by 1 person
Wow, this took me right back to one of the first Sci-fi books I read that used mirrors as a Mordant.
Can you imagine that in Medieval times you might be thought of as a witch for creating such wonderful paintings using plants and getting these wonderful and beautiful results?
You are an inspiration! I wish I was a whole lot closer to join you for a workshop or class!
LikeLike
Ooh, witchcraft —I like it! Especially with not being in danger of being burnt at the stake. A type of magic, certainly. Yes, pity about not living closer—I wouldn’t mind some tips on photography, either. I’m pretty useless…
LikeLiked by 1 person
Great artwork! Also thanks for sharing the related accounts to see more creativity. Really like those printing concept.
LikeLike